Account Settings: A Complete Guide

We continuously enhance our exchange by introducing new tools and improving existing ones, with a strong focus on security. This section provides detailed instructions to help you navigate account settings and customize them to your needs effortlessly.
To access account settings, simply hover over the account icon on the exchange’s main page.

After opening the section, you will see three main blocks, each of which is designed to work with separate aspects of the account settings:
- General
- Security
- API
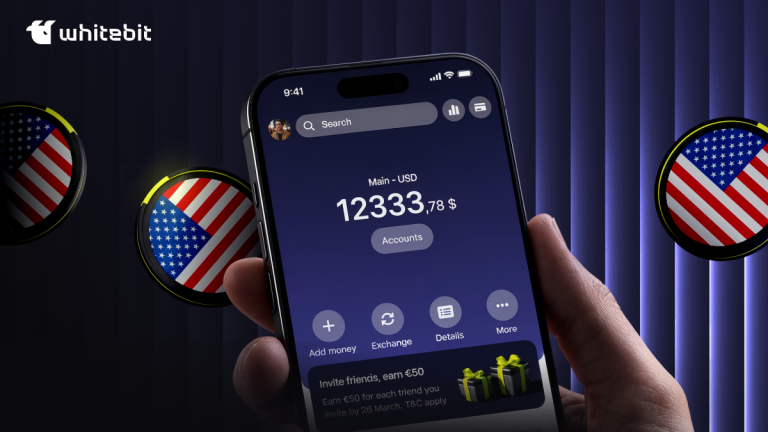
Unlock the full power of WhiteBIT
The “General” Section

In this section, you can view, copy, and change your exchange nickname (one-time only), set leverage for margin and futures trading, select your email language, link your exchange account to your lifecell account, and manage subaccounts. Let’s explore each option in detail.
Nickname
To ensure the highest level of protection of your data, we implemented a system of nicknames, where each exchange user has a unique tag and number. A nickname includes a random name (adjective + cryptocurrency name) and a four-digit tag (e.g., #1111). If users have the same first part of the nickname, it will be made unique using a numerical tag. Tags are changed only if the nickname is changed, and the user cannot choose a tag independently because they are assigned randomly. You can change your nickname yourself only once.
To view or change your nickname, click “Nickname,” enter a new nickname, and click “Confirm.”
Communication Language
In this section, you can select the preferred language for all emails you receive from us, including technical notifications. Available options: Ukrainian, English, and Spanish.
Leverage
Leverage is the ratio of borrowed funds to your funds that you use for margin trading. You can manage it in “Account settings.” Click on “Leverage,” select the size with the slider, and click “Save.” Note that changing the size of leverage will affect all your margin and futures trading positions.
Please note that the maximum leverage of 100x applies only to futures trading, while the maximum available leverage for margin trading is 10x.
Access via the USSD Menu
The USSD menu function allows performing some operations on the WhiteBIT exchange without an Internet connection. Users from Ukraine who use the services of lifecell mobile operator can connect their exchange account to the lifecell number and have access to viewing the balance, transferring and exchanging funds, and receiving the address for the deposit. If you do not have this function connected, click “Access via USSD menu,” then “Continue.” Enter the 2FA code and follow the instructions.
Sub-Accounts
A sub-account on WhiteBIT is an additional account linked to your main account, designed for testing strategies, managing risks, and training traders without affecting your primary balance. You can create up to 10 sub-accounts, each inheriting the bonuses and discounts of your main account while maintaining limited functionality.
Sub-accounts cannot deposit or withdraw funds, but they are available for spot, futures, and margin trading. To activate them, users must either pass KYC verification separately or transfer it from their main account. Additionally, sub-accounts can be managed via API, allowing for automation and seamless trading integration.
The “Security” Section

In this section, you can manage account security settings, such as password change, address management, activation of two-factor authentication, and others.
Change Password
The first in the list of available operations is changing the password for your WhiteBIT account. Click “Change password” to change your current account login password. A form will open where you need to enter your current password, enter a new one, and confirm the change by pressing “Save.” Note that you can also see when your password was last edited.
Two-Factor Authentication
Two-Factor Authentication (2FA) is identity verification to access an account, providing additional account protection. In this section, you can scan the QR code and activate 2FA.

You can also set up an access key (passkey), a unique identifier designed for secure authorization and action confirmation on the exchange. It serves as a password replacement, verifying the legitimacy of system interactions using a pair of private and public keys. For enhanced security, we recommend enabling Passkey alongside 2FA.
Allowlist
The address management feature lets you whitelist the addresses you use for withdrawals. To add a new address, click “Edit”. This security feature ensures that withdrawals can only be made to pre-approved addresses, adding an extra layer of protection to your funds. If an address is on the allowlist, withdrawals will be restricted to that address only. Enabling or disabling this function requires entering a two-factor authentication code.
Billing Details
The “Billing Details” section lets you securely save the withdrawal addresses you frequently use. This way, you won’t need to enter them manually each time — simply select a saved address and confirm the transaction for a faster and more convenient experience.
Partnership Subscription
A partnership subscription enables you to add an affiliate code and unlock exclusive discounts and bonuses on WhiteBIT.
Anti-Phishing
Confirming your anti-phishing code can prevent phishing attempts from fake WhiteBIT websites or e-mails. To do so, go to the settings, click “Anti-phishing,” enter the code, and click “Save.” Then, enter the 2FA code to confirm the transaction.
Logout Time
In this block, you can set the automatic logout time from the account without activity. If you are logged in and forget to log out, the function will close access to the account for the device from which you logged in. Available time slots are 30 minutes, 1 hour, 8 hours, 1 day, 7 days, 14 days, and 30 days.
Device Management
You can log into your account using mobile phones, tablets, and other computers. In the “Device management” block, you can cancel one specific session and all active sessions from all devices simultaneously by clicking “Cancel all.”
Login history
Here, you can view information about the devices from which you logged in to your account, namely:
– name of the device;
– login time;
– IP address of the device;
– the country;
– login method (authorization via email, Web3, or QR code).
If you sign in using a QR code, you will also see the IP address of the device from which the code was scanned, the country in which the device is located, and its name.
Web3
You can also log in to WhiteBIT using a Web3 wallet. To use this feature, you must install your browser’s wallet extension and enable two-factor authentication on the exchange. In the “Web3” block, find the wallet you need in the list. If your wallet is not listed, click “I’m feeling lucky” to enable the system to detect the wallet extension connected to your browser.
Login via the QR Code
It is another convenient method of entering the exchange for mobile application users. Now you can go to your profile in the web version of the exchange using a QR code. In this block, you can turn the function on or off.
App Authorization
Authorized services let you log in to third-party platforms via WhiteBIT without creating a separate account. It’s fast, secure, and time-efficient — just confirm access and start using the service. This section displays all the platforms you’ve accessed through your WhiteBIT account.
Set up your account your way
Account Connections
Easily log in to WhiteBIT using your Google or Apple account. No need to create a new login or password — simply connect your account and get instant access to the exchange.
The “API” Section

An application programming interface (API) key is a unique code to identify an application or user. API keys track and control who is using the API and how. This block consists of two sections.
АРI Keys
In this section, you can generate and configure an API key by selecting the correct permissions in the endpoint access restrictions section. To create a key, click “Generate API Key,” enter the 2FA code, name the key, activate the necessary accesses, and click “Confirm.”
Thanks to the automatic deactivation function, the API key will be deactivated if there is no activity within 14 days from the last activity with this key. The expiration date of the keys can be viewed by clicking on “API Keys.”
Webhook
The function allows you to receive notifications about code activation or deposit confirmation. Click “Webhook” and “Continue.” In the open window, specify the address and click “Generate Key.” Confirm the operation with the 2FA code and click “Confirm.” Done!
See, there’s so much you can do within only one section! Proceed to the “Account settings” now to check it out yourself and set up your account as you like.